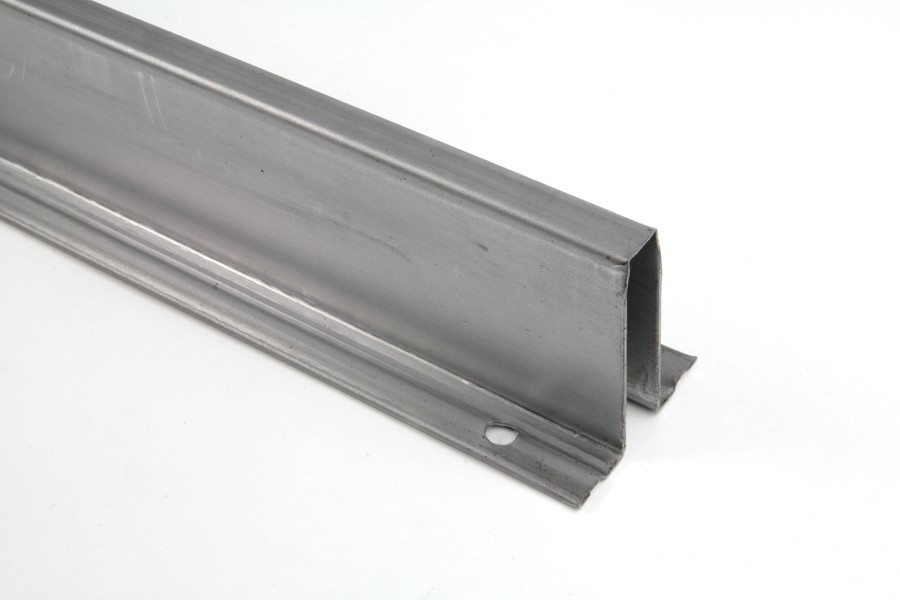
Installing a strut on a bent garage door involves adding structural support to help straighten and reinforce the damaged section. This process requires careful attention to detail and safety precautions. It is advised to seek professional assistance for this job. Here's a step-by-step guide on how to install a strut on a bent garage door:
Materials and Tools:
Garage door strut
Power drill
Lag screws or bolts
Wrench
Safety glasses
Ladder or step stool
Procedure:
1. Assess the Damage:
- Before starting the installation, carefully assess the extent of the damage to the garage door. Identify the area where the door is bent or sagging to determine the appropriate placement for the strut.
2. Gather the Necessary Tools and Materials:
- Ensure you have all the required tools and materials listed above.
3. Choose the Right Strut:
- Select a strut that is appropriate for the size and weight of your garage door. Struts are available in various lengths, and you'll want one that spans the damaged section adequately.
4. Open the Garage Door:
- Lift the garage door to its fully open position. This will relieve tension on the springs and make it easier to work on the damaged section.
5. Position the Strut:
- Place the selected strut horizontally along the damaged section of the garage door, ensuring it spans the bent or sagging area. The strut should be positioned on the inside of the door, parallel to the damaged section.
6. Mark the Mounting Holes:
- Use a pencil or marker to mark the locations for the mounting holes on both ends of the strut. The holes should align with the vertical supports on the garage door sections.
7. Drill Pilot Holes:
- With the strut in place, use a power drill to create pilot holes through the strut and into the garage door. Make sure the holes are slightly smaller than the lag screws or bolts you'll be using.
8. Secure the Strut:
- Insert lag screws or bolts through the pilot holes and tighten them using a wrench. Ensure the strut is securely fastened to the garage door.
9. Repeat if Necessary:
- If the damage extends over a larger area, you may need to install additional struts. Repeat the process, positioning the struts as needed to provide sufficient support.
10. Test the Door:
- Carefully lower and raise the garage door to ensure smooth operation. The strut should provide additional support, reducing the bend or sag in the damaged section.
11. Consider Professional Assistance:
- If the damage is extensive or if you are unsure about the installation process, it's advisable to seek the assistance of a professional garage door technician. They can assess the situation and provide recommendations for repairs or replacements.
Remember that safety is paramount when working on garage doors. If you are uncomfortable or unsure about any aspect of the installation process, it's best to consult with a professional to ensure proper repairs and maintenance.

