
Your garage door’s bottom panel is doing way more than you think. While it looks like just another piece of the door, it’s a critical barrier against weather, pests, and energy loss. When neglected, damaged panels can lead to increased utility costs, security risks, and structural issues. The good news is that most problems are pretty easy to spot if you know what to look for. We'll walk you through the warning signs, help you pick materials that'll actually last, and show you how to handle repairs safely.
5 Warning Signs You Need Garage Door Bottom Panel Replacement
Garage doors endure constant stress from weather, impacts, and daily use. Here’s when to take action:
Visible Damage That Demands Immediate Attention
Stains, rust, or warping on the bottom panel often signal moisture damage. A cracked or bent panel disrupts the door’s balance, straining hinges and springs over time (Clopay Door Blog, 2025). Separation between panels invites pests like rodents. In one case, a warped panel cost a Michigan homeowner $1,200 in chewed-through storage boxes.

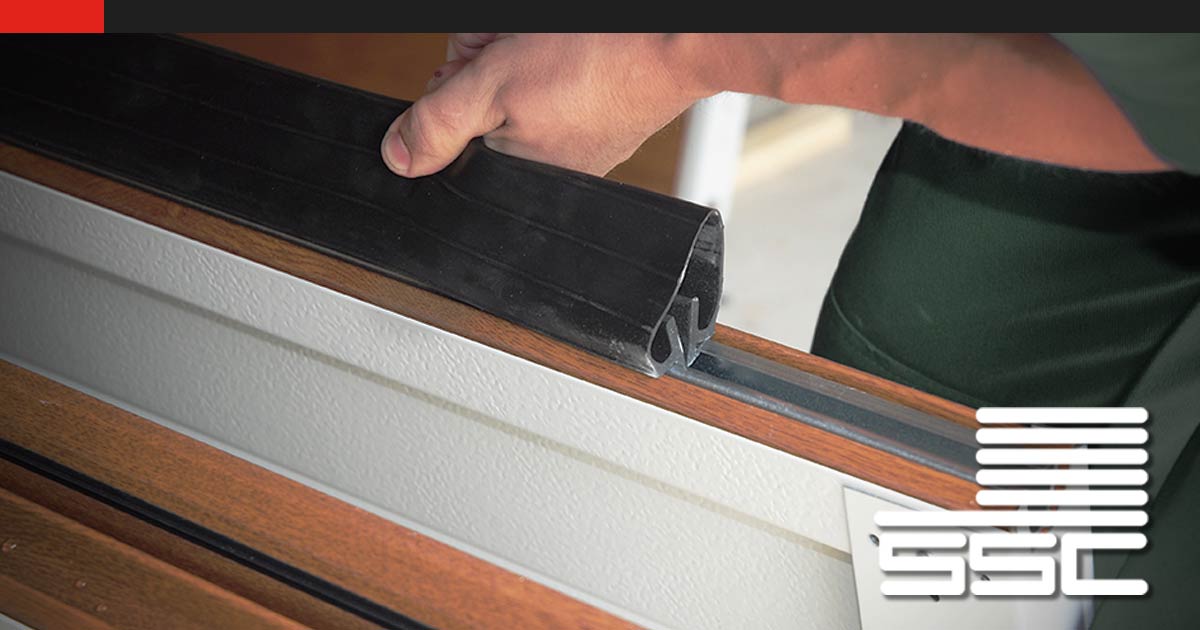
Compromised Weather Seal Efficiency
A torn or detached rubber seal lets cold air seep into your garage. Studies by Amarr Garage Doors show poorly sealed doors increase heating costs by up to 20% in attached garages during harsh winters 1. Try running your hand along the seal, and if it’s brittle or cracked, it’s time for a replacement.
Safety Risks You Can’t Ignore
Sagging panels or misaligned tracks can cause doors to jam unexpectedly. What’s worse, gaps wider than 1/4" also become entry points for pests and even intruders, as noted in home security guidelines from the Ontario Ministry of Corrections 2.
Choosing the Right Garage Door Bottom Panel Material
What works best for you depends on your climate, budget, and style goals.
Steel Panels: Built for Tough Climates
Galvanized steel panels resist dents and last 20–30 years, even in Midwest winters. They’re ideal for extreme weather but require rust-resistant coatings in coastal areas. Replacement costs average $150–$500 per panel, though prices vary regionally 34.
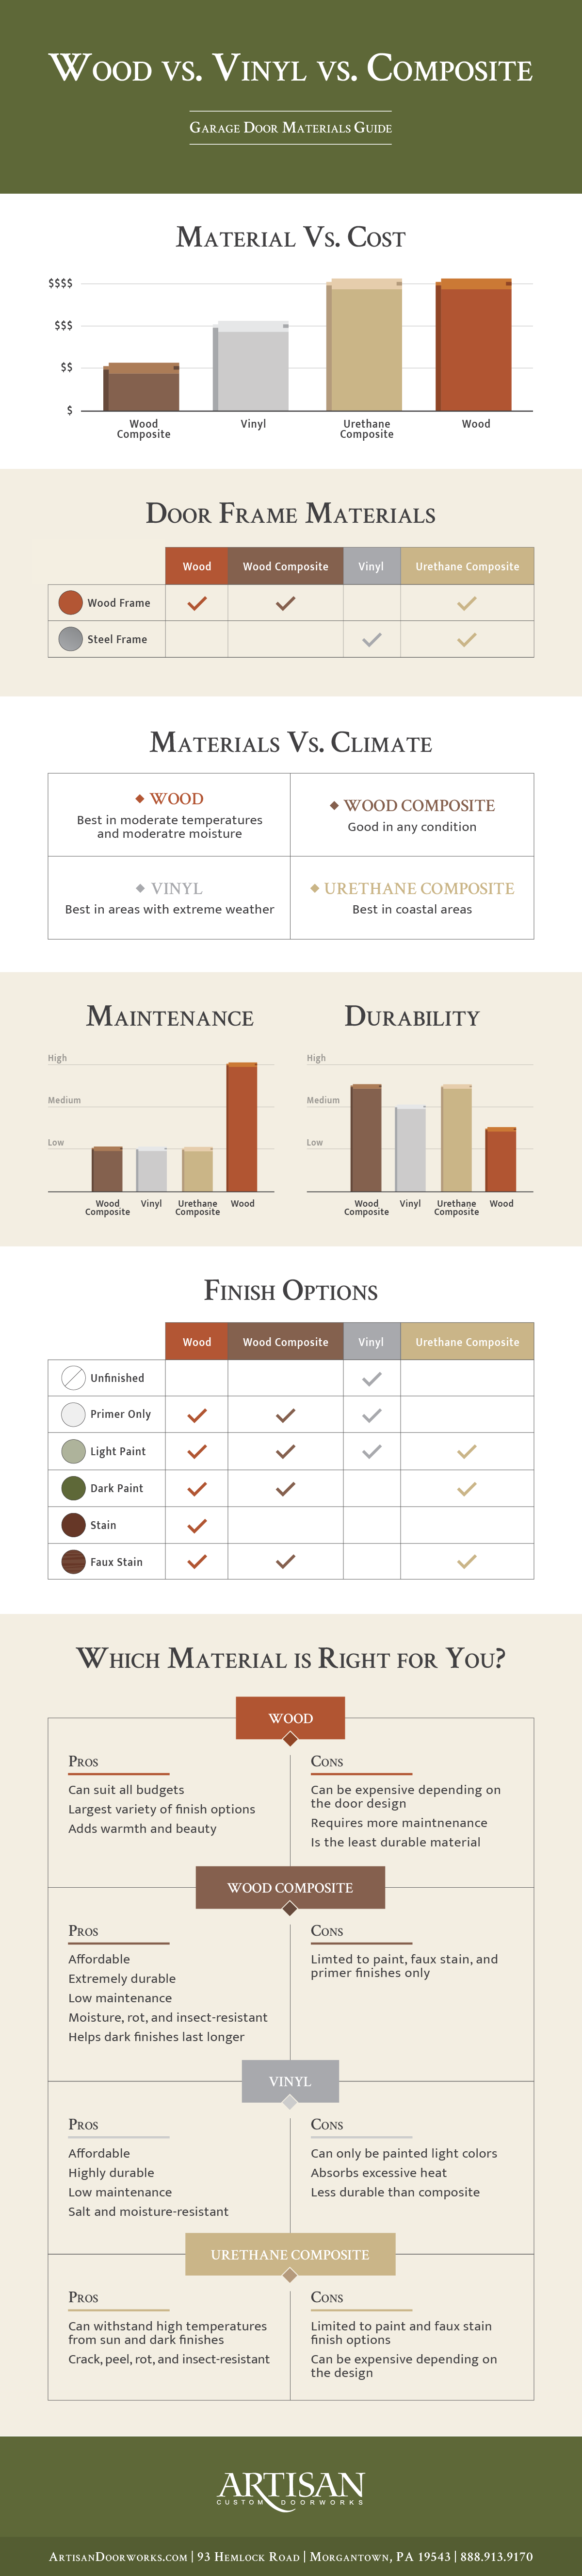
Vinyl and Composite Options: Low Maintenance, High Efficiency
Vinyl’s corrosion resistance shines in rainy regions, while composite blends like polyurethane-insulated fiberglass cut energy loss. A Texas homeowner reported a 15% drop in summer cooling bills after switching to composite panels 5.
Wood Panels: Style With Strings Attached
Customizable cedar or redwood panels are great for traditional homes, but they demand annual sealing. Skip these if your area gets heavy snowfall as trapped moisture warps untreated wood quickly 3.
Step-by-Step Garage Door Bottom Panel Replacement
Ready for DIY? Follow these steps, and never skip safety.
 ⚠️ Critical Safety Note: Torsion springs store lethal force. If your door weighs over 150 lbs, hire a pro 7.
Tools You’ll Need: Socket wrench, locking pliers, replacement panel, lag screws.
Disconnect and Secure the Door
Pull the emergency release cord to detach the opener. Prop the door open with a 2x4 block and clamp the tracks with locking pliers 8.Remove the Damaged Panel
Unscrew hinges connecting the bottom panel to the second panel. Slide out the old section carefully to avoid damaging adjacent panels 9.Install the New Panel
Align the replacement panel’s hinges upward. Secure with rust-proof lag screws, tightening diagonally to prevent warping. Reconnect the opener and test the door’s balance. It should stay put when lifted halfway 10.
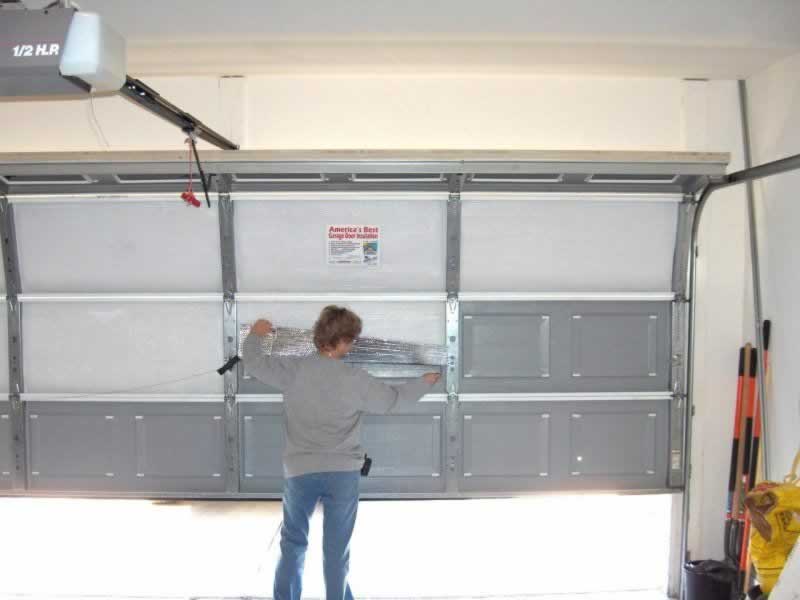
Insulating Your Garage Door Bottom Panel: Beyond Temperature Control
A well-insulated panel reduces noise and energy bills.
Understanding Insulation Metrics
R-Value (thermal resistance): Polyurethane foam (R-12 to R-16) outperforms polystyrene (R-8) but costs 30% more 11.
U-Factor (heat transfer rate): Aim for values below 0.30. The DOE estimates this cuts annual heating costs by $45–$75 in attached garages.
Upgrade Tip: Threshold Seals
Add an aluminum threshold seal to block drafts under uneven doors. Minnesota homeowners saw a 25% drop in garage ice buildup after installing these.

3 Non-Negotiables for Long-Term Garage Door Health
Monthly Visual Inspections: Check for new dents, seal gaps, or rust spots.
Lubricate Moving Parts: Apply white lithium grease to hinges every 6 months.
Professional Tune-Ups: Schedule spring tension checks biennially as DIY adjustments risk injury.
A well-organized garage with various tools can be seen here:
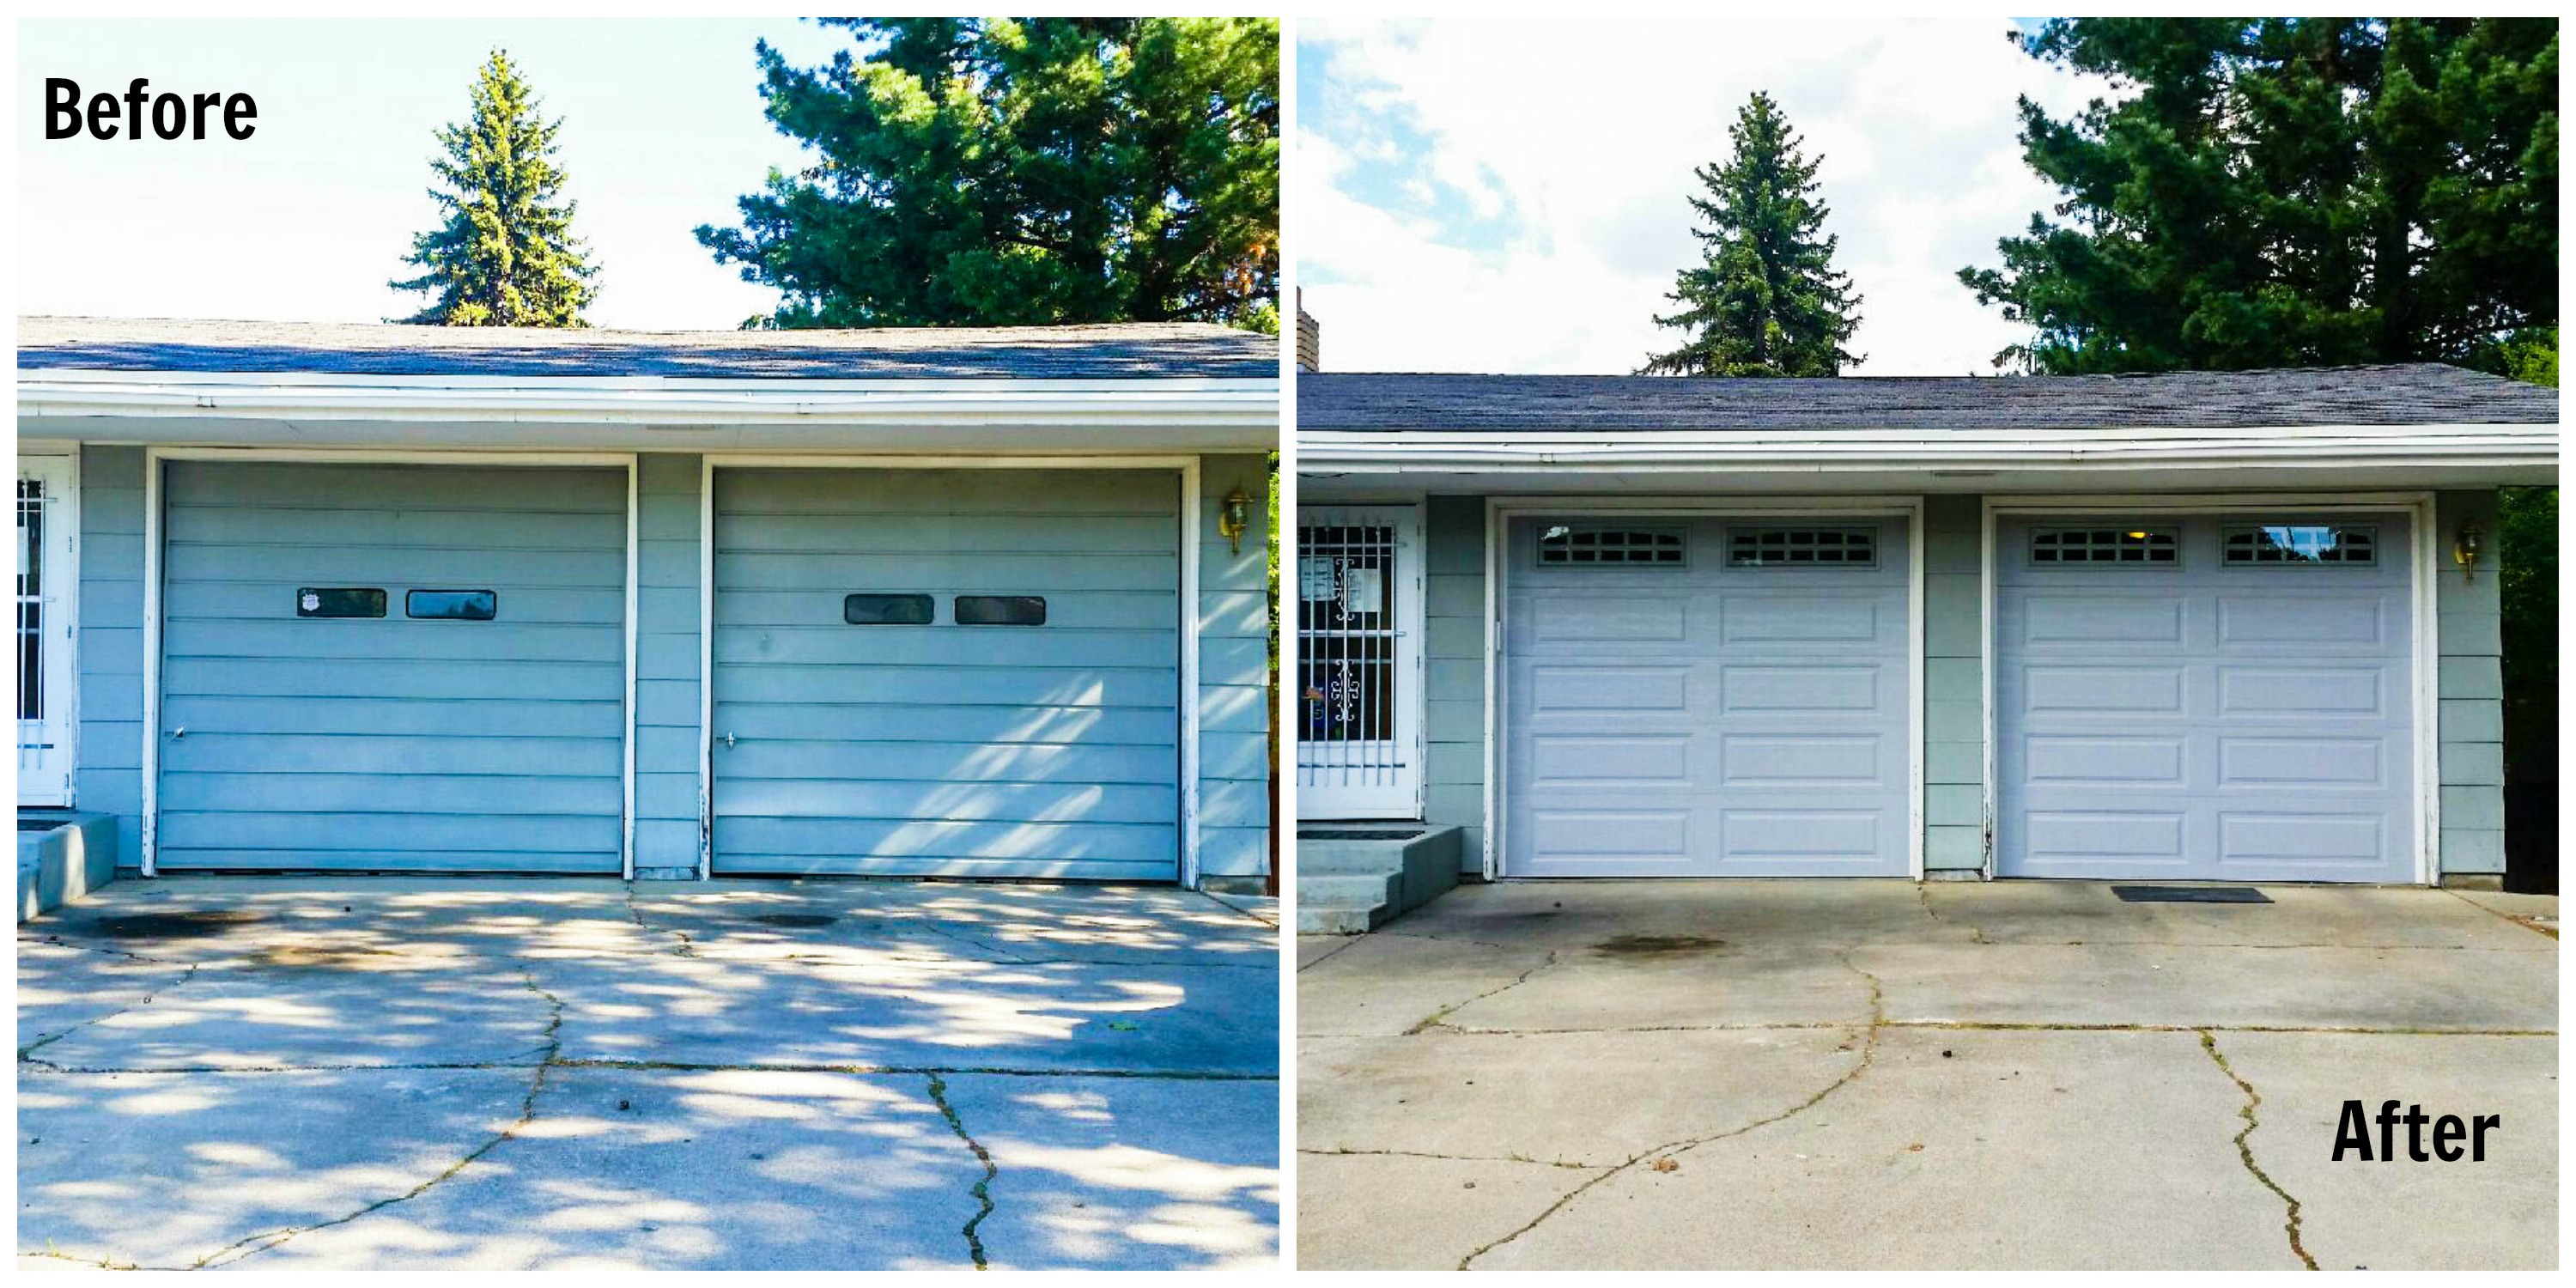
 Final Word: Replacing a bottom panel is doable for savvy DIYers, but don’t forget to always prioritize safety. When my neighbor tried fixing torsion springs alone, he cracked his garage wall, which costs around $900 to repair. Some jobs are worth calling in the pros, especially when springs and heavy doors are involved. With the right materials and care, your garage door will keep doing its job well for the years to come.