
Polyurethane Garage Door Sealant: Ultimate Heat Loss Solution
Meta Description: Polyurethane garage door sealant prevents heat loss with superior insulation. Learn installation tips, cost savings, and climate-specific strategies.
Garages often act as hidden energy drains, with uninsulated doors accounting for 10–20% of home heat loss annually according to U.S. Department of Energy studies. For homeowners like Sarah in Minnesota, who slashed her winter heating bill by 15% after upgrading, polyurethane garage door insulation offers a game-changing solution. Let’s explore how this material outperforms alternatives and delivers lasting comfort.

Why Polyurethane Garage Door Sealant Outperforms Other Materials
Polyurethane combines insulation with structural strength, making it a top choice for modern garages.
Science-Backed Heat Resistance
Polyurethane’s secret lies in its R-value (6–7 per inch), a measure of heat flow resistance. This dwarfs polystyrene’s R-3.8–R-4.8 rating, thanks to gas-filled cells that trap warmth like a thermal blanket 12. Homes using it report garages staying 12°F warmer in winter without overworking HVAC systems.
Built to Last
When Jake from Texas installed polyurethane-sealed doors, he noticed immediate changes: fewer rattles during storms and no warping despite 90% summer humidity. The foam expands to reinforce door panels, blocking moisture that causes rust in coastal areas 3.

Quiet and Cost-Effective
By absorbing vibrations, polyurethane cuts garage noise by 40% 4. Though pricier upfront than $30 polystyrene kits, its 20-year lifespan avoids frequent replacements, which saves $200–$500 long-term.
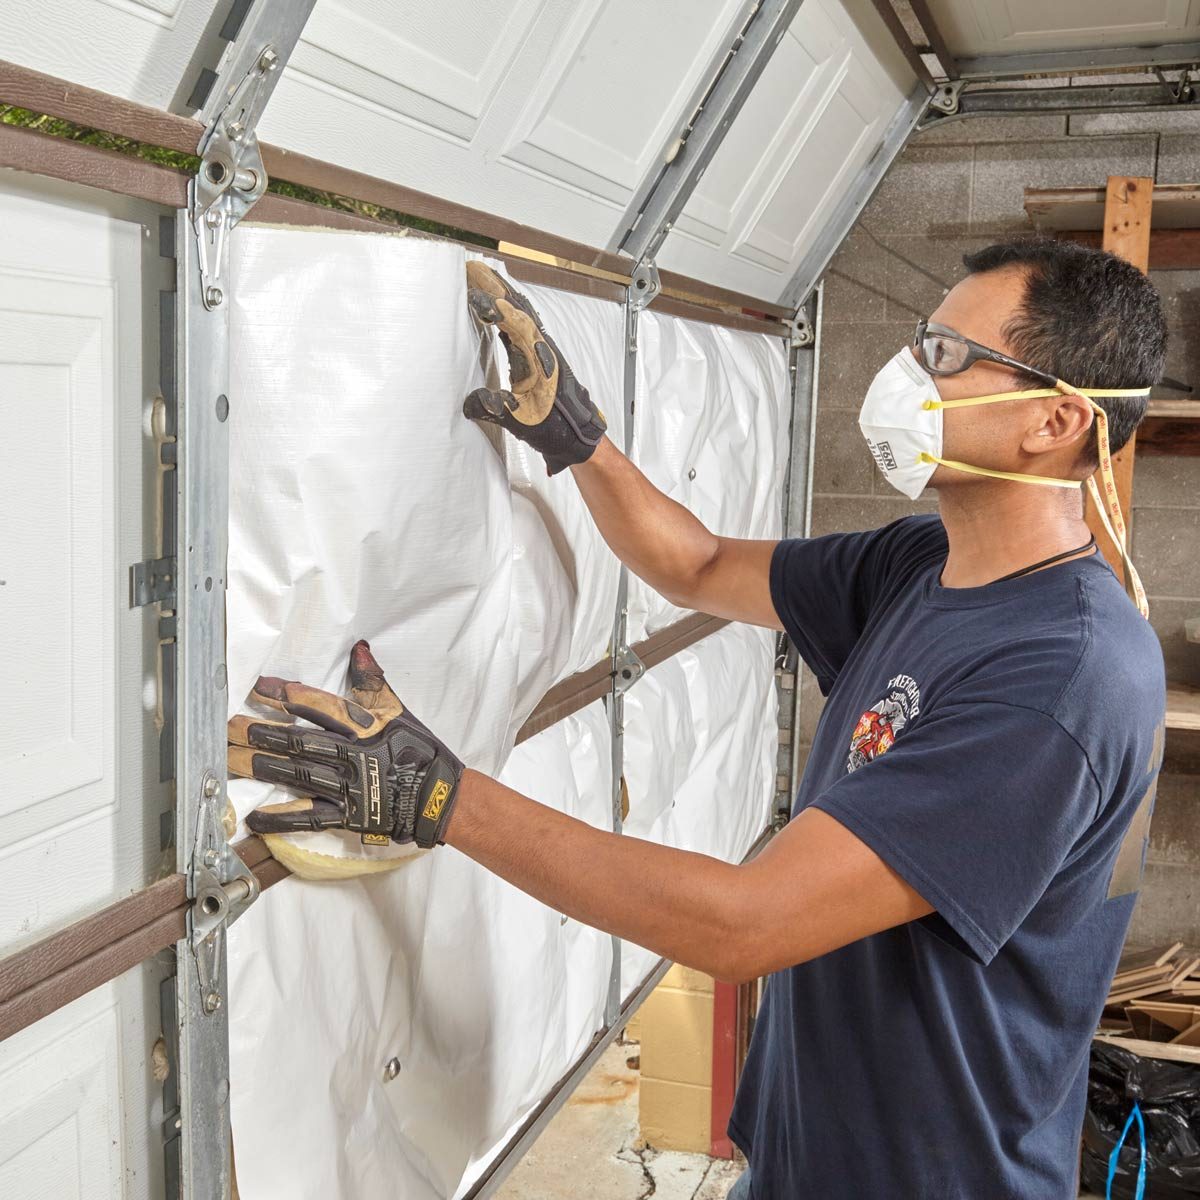
DIY Garage Door Insulation: Avoiding Common Mistakes
Kits like Reach Barrier’s $59.99 system (2025 pricing) simplify DIY projects, but watch for these pitfalls:
- Measurement Errors
Misaligned cuts around hinges can create gaps. Use cardboard templates and rotary tools for precision 5. - Adhesive Issues
Texas homeowner Mia learned the hard way when summer heat melted her bargain sealant. Marine-grade adhesives like Weather Defender® withstand extreme temps 6. - Safety First
Always wear gloves and masks when handling spray foam to avoid skin irritation.
Climate-Tailored Insulation Strategies
Cold Climates
Opt for R-12+ insulation and seal gaps with heavy-duty weatherstripping. Alaskan contractors recommend double-layered thresholds to block icy drafts 7.
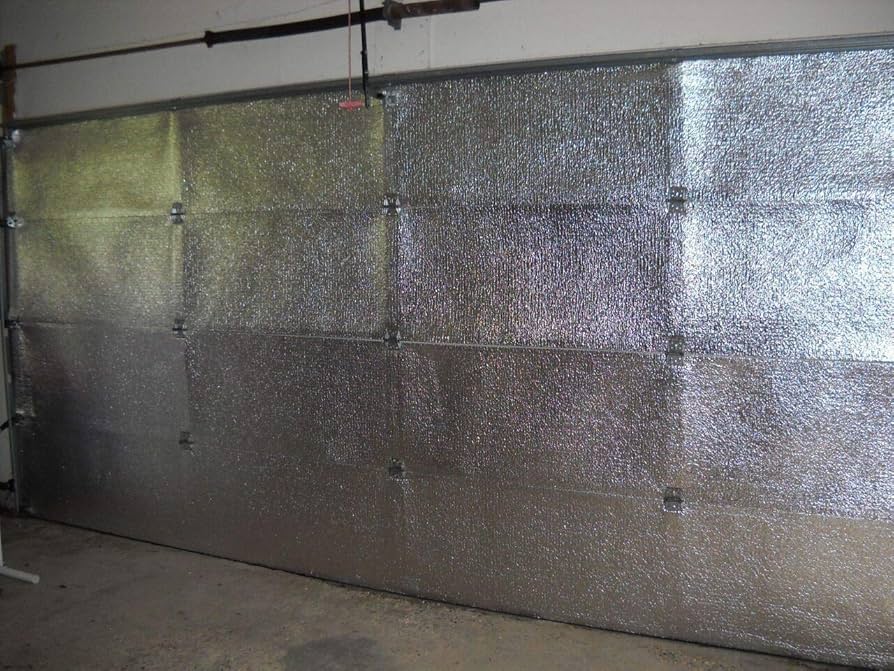
Hot/Humid Regions
Pair moisture-resistant polyurethane with reflective foil. Florida’s Gulf Coast homeowners combine both to deflect solar heat while preventing mold.
Temperate Zones
A mid-range R-8–R-10 balance cuts energy use without overspending. Oregon’s mild winters make this the sweet spot 7.
Costs and Complementary Products
- Polyurethane Kits: $60–$170 DIY; $700–$2,000 professionally installed 9.
- Polystyrene: Affordable ($30–$100) but degrades faster in humidity.
- Must-Have Add-Ons:
- GaraDry® adhesive for waterproof thresholds 10
- RodentBLOCK® seals to deter pests
Maintenance Made Simple
- Biannual Checkups: Inspect seals every 6 months for cracks or pest damage 11.
- Gentle Cleaning: Wipe with a damp cloth. Harsh chemicals erode adhesives.
- Weatherstripping Refresh: Replace every 3–5 years to maintain airtight seals 12.
Assess Your Garage’s Needs in 3 Steps
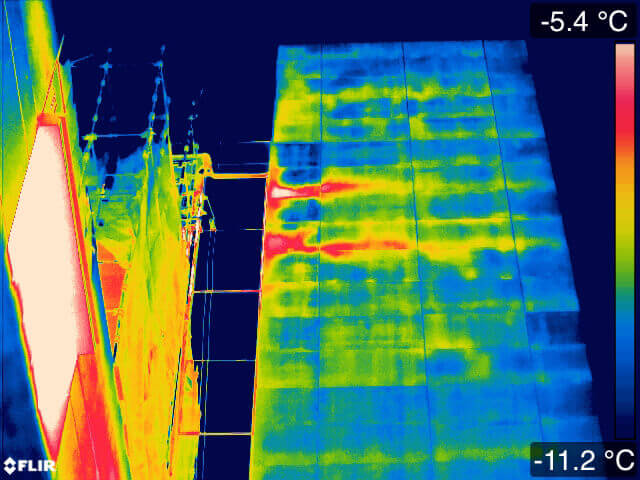
- Thermal Scan: Use a $50 infrared camera to spot leaks at panel joints 13.
- U-Factor Check: Compare your door’s rating (aim for ≤0.5).
- Bill Audit: Note seasonal energy spikes hinting at insulation gaps 14.

Upgrade Smart, Save More
Polyurethane garage door sealant is both insulation and a shield against energy waste. Take Sarah’s lead: assess your garage this weekend using the steps above, then consult a certified installer. With the right approach, you’ll turn this overlooked space into an efficiency powerhouse.