
You're standing in your garage right now with a new keypad in your hand, looking at your opener, and wondering how these two devices are supposed to talk to each other. Good news: programming a garage door keypad takes about 5 to 10 minutes once you know the process. The tricky part is that most models give you only a 30-second window to complete the setup, and if you miss it, you start over.
This is one of those garage door repairs you can safely handle yourself without worrying about dangerous springs or cables. The process involves syncing your keypad with your opener's "Learn" button, entering a secure PIN, and testing the connection. We'll walk you through the exact steps, explain brand-specific differences, and troubleshoot the most common problems that trip people up.
Did You Know? About 40% of first-time programming attempts fail simply because people run out of time during the 30-second programming window. Having everything ready before you start dramatically improves your success rate.
What you need before you start
Find your opener's Learn button before touching the keypad. This button sits on the back or side panel of your opener motor unit, usually colored red, orange, purple, or yellow. You'll need a ladder to reach it on most models. The button color matters because some brands require different programming sequences based on that color.
Choose your 4-digit PIN right now and write it down. Don't use obvious codes like 1234 or your birth year. Pick something random like 7293 that you can remember but others can't easily guess. Security experts recommend avoiding repeating digits or sequential patterns.
Understand that you're working against a clock. From the moment you press that Learn button, you typically have 30 seconds to complete the entire programming sequence. This isn't enough time to figure things out as you go. Read through all the steps first, then execute them quickly.
Check your opener's age too. If your system was installed before 1993, it might use fixed-code technology that won't sync with modern rolling-code keypads. Most openers from the past 20 years work fine with any compatible wireless keypad.
| Opener Age | Keypad Compatibility | Learn Button Feature |
|---|---|---|
| Pre-1993 | Fixed-code only | Usually none |
| 1993-Present | Rolling-code standard | Red, orange, or purple |
| 2011-Present | Security+ 2.0 | Often yellow or purple |
If you're having trouble locating your Learn button or the opener won't respond at all, check out our garage door opener troubleshooting guide for help diagnosing opener problems.
Programming a new keypad step by step
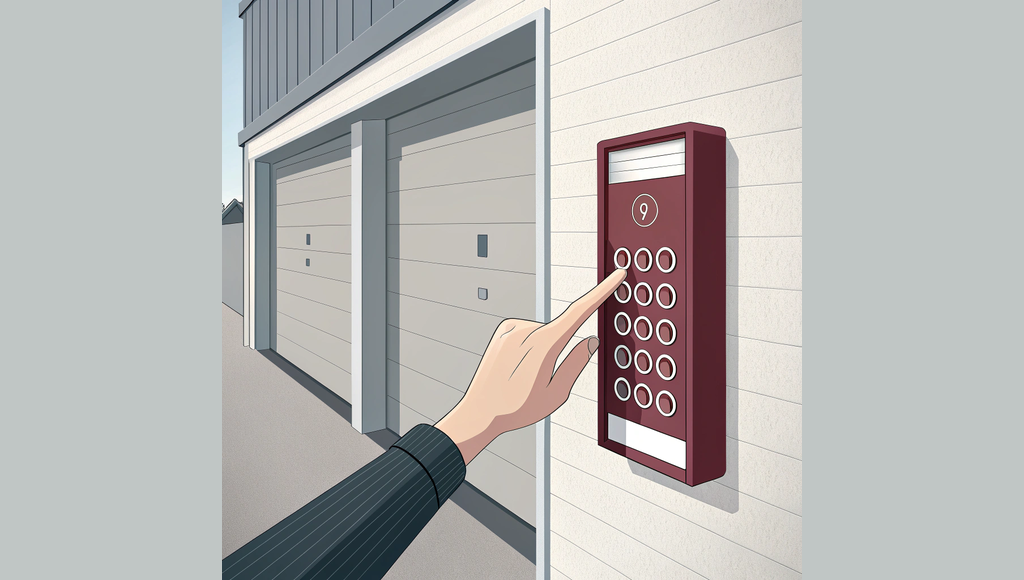
Press and hold both the asterisk and pound buttons on your keypad until the LED light starts flashing. This takes about 10 to 15 seconds on most models. The flashing light means your keypad is now in programming mode and ready to sync.
Walk over to your opener and press the Learn button once. You'll see a light turn on or start blinking. This signals that your opener is listening for a new device. Don't hold the button down, just a quick press.
Immediately return to your keypad and enter your 4-digit PIN. You need to do this within 30 seconds of pressing the Learn button, so move quickly. After entering the four digits, press the Enter key. On some keypads this is the pound sign, on others it's a dedicated Enter or Program button.
Watch for confirmation. The opener light should blink or turn off, and many keypads beep once to confirm successful programming. The whole sequence from pressing the Learn button to getting confirmation takes about 45 seconds if you move efficiently.
Test it right away. Enter your PIN followed by Enter. Your garage door should start moving. If nothing happens, you probably timed out and need to repeat the entire process from the beginning.
Time Saver: Before you press that Learn button, stand at your keypad with your PIN written on a sticky note in your hand. The moment you press Learn, you can move fast without hesitating or second-guessing your code.
If your door opens but the safety sensors seem misaligned or the door reverses unexpectedly, that's a separate issue from keypad programming that needs attention.
Brand-specific differences that matter
Chamberlain and LiftMaster openers use the same parent company technology, so their programming process is nearly identical. The main variable is the Learn button color. If you see an orange or purple Learn button, you might need to press the Enter key three times instead of once after entering your PIN. Red Learn buttons typically follow the standard single-press sequence.
Genie openers march to their own drummer. After entering your PIN on a Genie keypad, press the pound key three times rapidly. The opener light will flash twice when programming succeeds. Genie also positions their Learn button in different spots, sometimes on the side of the motor housing rather than the back panel.
Craftsman openers usually follow Chamberlain's programming method since many Craftsman units are rebranded Chamberlain models. Check your owner's manual to confirm, but the red Learn button sequence works for most Craftsman systems.
Universal keypads claim to work with any opener brand, and they mostly deliver on that promise. Their programming process involves an extra step where you first tell the keypad what brand opener you have by entering a specific manufacturer code, then proceed with standard Learn button syncing.
| Brand | Learn Button Color | Enter Sequence | Programming Window |
|---|---|---|---|
| Chamberlain | Red/Orange/Purple | Enter once (3x for orange) | 30 seconds |
| LiftMaster | Red/Purple | Enter once | 30 seconds |
| Genie | Varies | Pound 3 times | 20-30 seconds |
| Craftsman | Red | Enter once | 30 seconds |
Considering an upgrade to smart home integration? Our guide to smart garage door opener installation covers adding WiFi connectivity and app control to your existing system.
When programming fails and what to do
You pressed all the buttons in the right order but nothing happened. Most likely, you exceeded the 30-second programming window. The opener stops listening after that time limit expires, and you get no error message. Just start completely over, moving faster this time.
Check your keypad battery next. A weak CR2032 battery causes all sorts of weird behavior including failed programming attempts. These batteries cost about $5 and last two years under normal use. Swap it out before trying anything more complicated.
The opener LED didn't light up when you pressed the Learn button? Some openers have a lockout feature that disables the Learn function for security. Check your owner's manual for how to re-enable it. Other times the Learn button itself has failed, which requires professional opener repair.
Neighbor interference happens more often than you'd think. If someone on your street is programming their garage door at the exact same moment, signals can cross and confuse both systems. Try programming during mid-day weekday hours when fewer people are home.
Your opener might simply be too old for modern keypads. Pre-1995 systems using fixed-code technology can't communicate with rolling-code security features on current keypads. At that point, you're looking at a full opener upgrade rather than just adding a keypad.
Quick Tip: Programming success rates jump from 85% on the first try to 95% on the second attempt. If it didn't work the first time, take a breath, review the steps, and try again before assuming you have a compatibility problem.
Professional installation makes sense for complex setups like multiple keypads with different access codes, integration with smart home systems, or situations where you've tried twice and it still won't sync. Expect to pay $75 to $150 for professional keypad programming and installation, compared to $25 to $35 for a basic keypad you install yourself.
If your keypad programmed successfully but now your garage door remote isn't working, that's a different troubleshooting path involving remote batteries and frequency interference.
Programming your garage door keypad yourself saves you a service call and gives you the satisfaction of solving a problem without help. The process is straightforward once you understand the timing requirements and brand-specific quirks. If you've followed these steps twice and it still won't connect, reach out to vetted professionals through Garage Door Handbook who can diagnose whether you're dealing with equipment failure or compatibility issues that require different solutions.
FAQs
How long does it take to program a garage door keypad?
Programming a garage door keypad takes 5 to 10 minutes from start to finish. The actual syncing process happens in about 30 seconds, but you'll need a few minutes to locate your opener's Learn button, choose a secure PIN, and test the connection. Most people succeed on their first or second attempt once they understand the timing requirements.
Why won't my garage door keypad program to my opener?
The most common reason is exceeding the 30-second programming window between pressing the Learn button and entering your PIN. Other frequent culprits include a dead keypad battery (CR2032), an older opener from before 1993 that doesn't support rolling-code keypads, or a disabled Learn button feature. Try replacing the battery and moving faster through the steps before assuming incompatibility.
Can I use any brand of keypad with my garage door opener?
Most universal keypads work with any opener manufactured after 1993, but you'll get the best results using the same brand as your opener. Chamberlain keypads pair seamlessly with Chamberlain openers, LiftMaster with LiftMaster, and so on. Universal models require an extra programming step where you enter a manufacturer code before syncing with the opener's Learn button.
What does the Learn button color mean on my garage door opener?
Learn button colors indicate different security technologies and sometimes require different programming sequences. Red buttons use standard Security+ technology with a single Enter press. Orange or purple buttons might need you to press Enter three times after your PIN. Yellow buttons typically signal newer Security+ 2.0 systems. The color helps you follow the correct brand-specific programming steps.